

My amended camera settings
1. Enable – super control panel
Menu > Custom Menu > D > Control Settings > Choose the Exposure Mode(P/A/S/M) > Press ‘OK’ next to Live SCP
From now on, when you press ‘ok’ in shooting mode, you will have quick access to all the settings. Much much better than the default live view mode.
2. Set max auto ISO to 6400.
Menu > Custom Menu > E > ISO Auto Set > Choose 6400
As beyond this files are no good, so no point.
3. Button/Lever functions
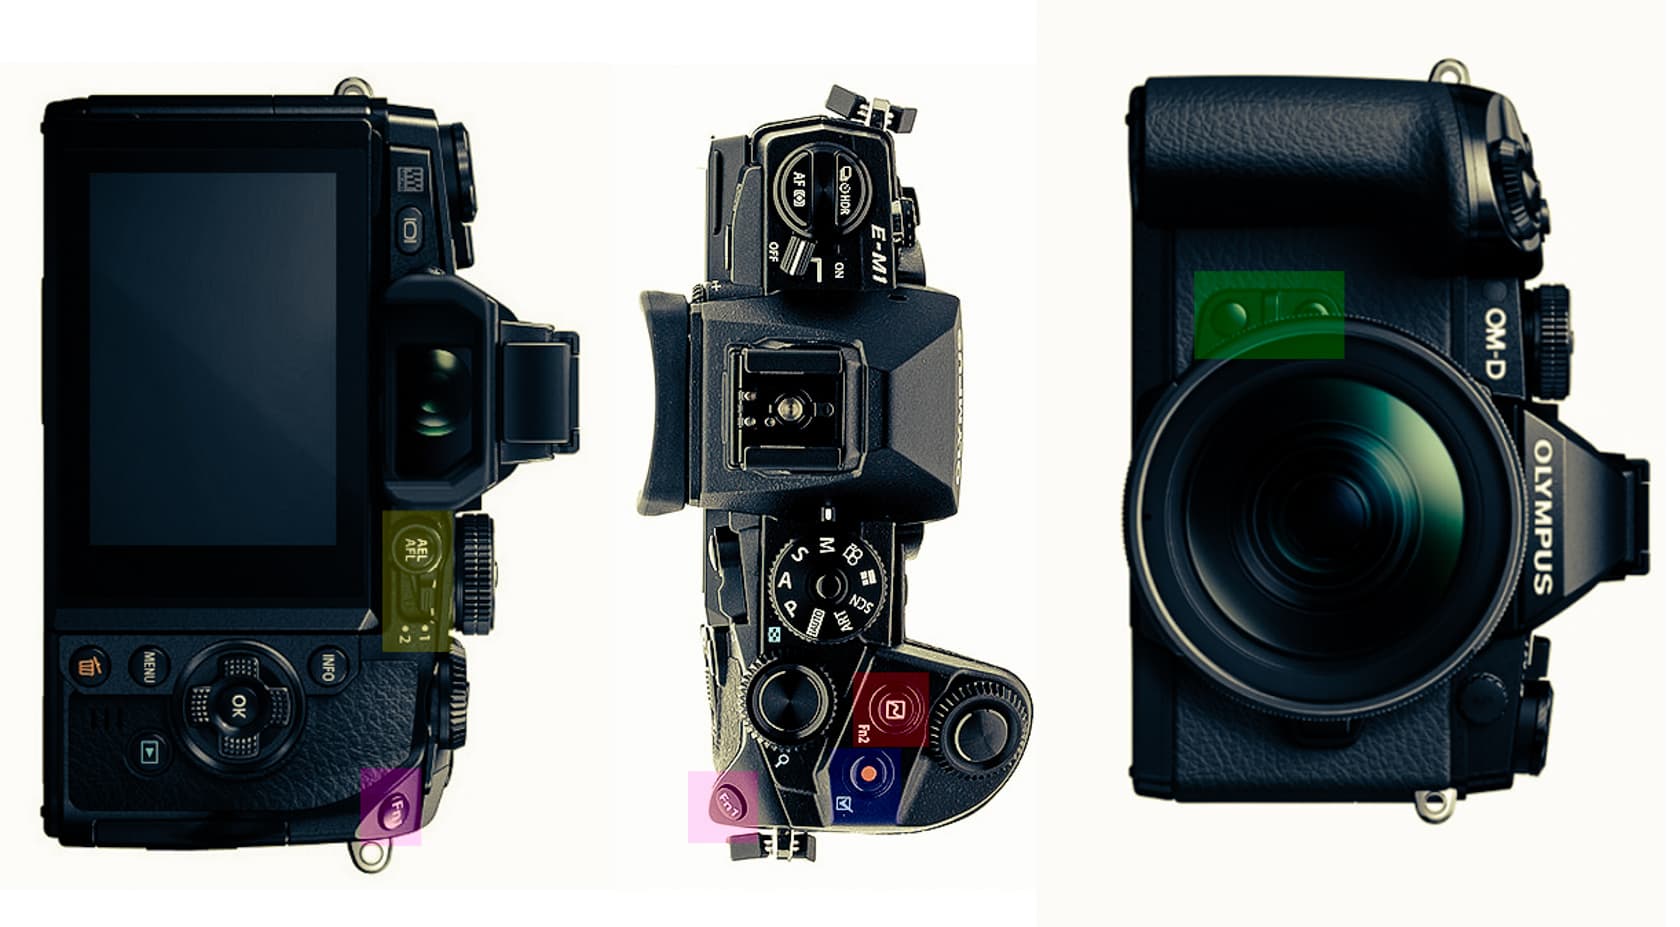
Set up to enable quick access to manual focus controls including focus peaking and magnify.
Menu > Custom Menu > B > Button function
Fn1 – […]
Fn2 – MF
Record button – Peaking
AEF/AFL – AEL / AFL
upper front – one touch white balance
lower front – Magnify
Menu > Custom Menu > B > Lever function
Up: Mode 1
Down: Off
4. Turn auto focus illumination off
Menu > Custom Menu > A > AF Illuminat. > choose off.
If you leave AF illumination on a red strobe will appear from your camera as it locks on the subject alerting then to your presence and intentions. Exactly what you don’t want on the streets!
5. Manual focus assist
Menu > Custom Menu > A > MF Assist > Magnify (off), Peaking (On)
If you leave magnify on you will loose framing control as soon as you switch into manual. This is annoying.
How i shoot
Standard set up:
1. Aperture priority dial selected.
2. ISO – as low as i think possible. NB at ISO 100 I feel the E-M1 has lower dynamic range than ISO 200. I.e in more contrasty situations stick with ISO 200.
3. Raw (I only shoot in RAW given how cheap memory is)
4. Auto WB.
When shooting AUTO focus
1. Single – auto focus (S – AF)
2. Spot focus.
Once i find my subject:
1. Check exposure (possibly using histogram, in particular i want to avoid blown highlights) – once i have correct exposure, select AEL button to lock exposure.
2. Focus spot auto focus area on subject, and half press front trigger to lock focus (much faster than moving the spot focus point around)
with the rear lever pointed up:
3. Adjust aperture by rotating front dial.
4. Adjust exposure by rotating rear dial
5. Take shot
When shooting MANUAL focus
1. Check exposure – once i have correct exposure, select AEL button to lock exposure.
2. Select the Fn2 button to transfer from auto into manual – focus peaking should automatically come on. [I often use auto to get me part of the way there to desired subject focus the switch to manual if i don’t get a lock.]
3. Rotate barrel to focus on selected area.
4. Adjust aperture by rotating front dial.
5. If happy in focus take shot. If not clear in focus, select the front lower button twice to magnify.
6. Rotate barrel to refine focus.
7. Select front lower button to close magnify
8. Select record button to turn on focus peaking for final check.
9. Take shot.